Thursday, February 26, 2009

Here they are!! The GORGEOUS March kits from My Creative Scrapbook!!

I think the main kit this month from My Creative Scrapbooks http://www.mycreativescrapbook.com/ has to be one of my all time favourites!!....The papers, the bling ~ gorgeous new ZVA CREATIVE crystal flourishes, the blooms!!!....I mean ton's of beautiful blooms, rub-ons, and can you say new PRIMA BUTTERFLIES? (ENABLER ALERT!!!!!!)......LOL! if you don't want to find yourself going scrap~stash shopping crazy.......try to avert your eyes LOL!! Here are a few l/o's I made with this months Main Kit (this first one is a photo of my handsome nephew's beautiful new baby girl!)......

The Zva Creative crystal flourishes included in this kit are some of my favourite from the new designs released at this past CHA, a lovely design and so easy to work with!!!.....and included in this kit is a full tin of Prima hydrangia blooms (over 100 flowers!!)....I used loads of them on my 3 layouts and my tin still looks full!!.....


This layout is about my newest obsessions.......I saw this girl on TV ~Whitney, from The City~ wearing this cute crocheted headband and decided I would teach myself to make some (lol! you'll see these headbands on me and both my girls in this months l/o's!).....so among my obsessions I have crocheting, reading, and dark chocolate with sea salt (it's good! try it!)....

Here are some close up photo's.....everything in this l/o is in the kit, except for the butterfly image that I simply printed out with my colour printer, cut out and stuck to the page. The green 'leave's' are a die cut in the kit that I added some green Stickles to. The flower centers and the white 'pearl' dots are simply some pearl dimensional paint. I used the Fiskar's 'Threading Water' punch to get nice even holes for my corset stitching. A number of people have asked me what punch I used for the 'lace' edging....it's a Martha Stewart punch I got from Michaels.....here are some close-ups......


And here is a 3rd l/o I made for this kit, I used lots of punches to make up this l/o of Meagan feeding the ducks at the cottage (if you look closely, you can see the bread flying through the air LOL!)....seriously, don't you just LOVE the papers in this kit??......

I used the beautiful new Prima butterfly on this l/o. To get that light 'blush' pink tint to the butterfly I used a Colorbox chalk ink in a deep rose, lightly dabbed on the wing edges behind the transparent butterfly wings. They are so pretty IRL but hard to photograph, here are some close-ups....


Another exciting kit being offered this month at My Creative Scrapbook is the Creative kit, again, beautiful papers, lovely blooms and so much more in this kit! Here is a photo I think is so cute of one of my handsome nephews and his beautiful wife (they are the same couple in the wedding 'Love' l/o I did last month......

I used a number of different techniques on this one. I used an embossing sheet I had (my sister bought it years ago and never used it!) as a stencil, and just used my (colorbox) chalk inks in blue and brown on it to create the flourishy painted frame. The sheer looking bloom I made using the backing from my rub-ons, cutting out a petal shape and edging it with Stickles......my recommendation would be to use velum instead, (I just happened to use the rub-on backing because I like to stick to kit items only when I make up a page for MCS).......I will be posting a tutorial on creating these blooms at MCS's tutorials thread in a couple of weeks! Here are some close-ups........


The papers in this kit are so rich and pretty as are the blooms! Here is a second l/o I made with the Creative kit......


There's a really cute MM Journal/Notes package in this kit, I used one of the sheets as a bracket mat behind the photo. I also added some brown polka dots to the little green blooms to add some punch to them (there is a full bottle of sweet Prima blooms in this kit!!) Here are some close-ups!....


As always there is also an album kit available at My Creative scrapbook, this one consists of that cute new collection by Cosmo Cricket called 'Girl Friday'......here is a l/o I made with this kit (you'll notice another one of those crochetted headbands I've been making in the pic on this one, ....I made a green one for Chloe, this being her favourite colour).....

I again used a Martha Stewart punch on the edges of this one. I just LOVE the pretty, shimmery Thickers alpha's included in this kit!! I also created a textural border using gold dimensional paint and green Stickles again for this l/o.........here are some close-ups....


And finally! last but NOT least!!! My Creative Scrapbook is offering the most gorgeous drool-worthy kit I've ever had the priviledge of working with! Pam went to the Winter CHA show and came back with orders for the most beautiful Prima goodies I've seen!!! The newsest line of Prima papers, a gorgeous pack of just newly released Prima blooms (plus a huge handful of a variety of extra Prima blooms).....a lovely Prima's transparent Paintable's sheet, and the show stopper!~~~ A lovely sheet of Stitched Mulberry paper!!! You have to see and feel this product to believe it! It has such a lovely texture and it actually already has real stitching on it!! here is a l/o I made with this kit! (and yes, lol!, here is Meagan's crocheted hairband that I made her in a rose/pink!...hmmm, I did mention it's become an obsession right?).....

Here are some close-ups of this layout.....I tried to get a close photo of the stitched paper for you....


And here is a second l/o I made this this lovely kit!! A photo of Meagan and her cute question about her giant pink 'diamond' ring ...'does this look like it's real Mommy?'....Lol!!! maybe if it was on Paris Hilton!!....

Here are some close up photo's, check out the cute brand new Prima 'pearl' flourishes (also included in this kit!!...told ya there were loads of awesome Prima goodies in this one!!)....


Okay! So if you made it this far into my blog I know that you're probably itching to get your hands on these goodies (I did post the enabler warning right? ROFL!!!).....here is a link to My Creative Scrapbook http://www.mycreativescrapbook.com/ ......check out the Design Team gallery, if you liked what you saw here wait till you see the rest of the girl's creations!! Thanks for taking the time to check out my latest work!


~Gabrielle xx

Wednesday, February 18, 2009

A challenge with a SWEET Prima Prize!!!


Like what you see? This could all be yours!!.....just pop on over to My Creative Scrapbook and enter the "Lift the Design Team Challenge" .....You have until March 15th to lift a layout done by any of the members of the My Creative Scrapbook Design Team (You can view the DT gallery to make your pick) For full details check out this link http://mycreativescrapbook.invisionzone.com/index.php?showtopic=761&st=0 It couldn't be easier, and who could resist this yummy prize!! Come check it out! :D
~Gabrielle xx

Monday, February 16, 2009

Trying my hand at card-making!!

I find I'm always in need of Thank-you cards, and with my parents 51st wedding anniversary coming up next week I thought I'd try my hand at card-making. Even my little girls joined me and made pretty cards for their Oma & Opa's anniversary. Here are a few of the cards I made and one that Chloe made......

To make this card I used the gorgeous Hibiscus flower crystal packet by ZVA Creativehttp://zvacreative.com/, it comes with a transfer sheet that allows you to move the image quickly and easily to your design project! I used some water colour pencils in the insides of the crystal petals and leaves and then used a lightly dampened Q-tip on the penciled area to get a watercolour look. Here are some close-ups...


Another Thank-you card I made using these pretty gold/bronze flourishes and green (center) bloom by Zva Creative......

I used a the paper tearing and inking techniques I've been using on some of my layouts and the corset stitching to make up this card. For the edges I used the Martha Stewart lace edge punch. Here are some close-ups.....


And this is an anniversary card I made for my parents upcoming 51st wedding anniversary. I found these cute glitter flourish stickers at my local dollar store. The card design was inspired by the fabulous shabby-chic style of my friend Paulien Vandenbosch http://paulienvandenbosch.blogspot.com/, she makes the most gorgeous cards you've ever seen. Here is my try at her style.....


I used some white pearl colour dimensional paint to make the 'pearls surrounding the '51' I made the circular "Happy Anniversary' tag with my Microsoft Works Word Processor. To do this you simply open a new document in word, ....along the top of the page there is a toolbar, you'll see a large blue capitol 'A' (on a tilt), click on this (it says 'insert word art'). Type the words that you want to go around your circle, for mine I typed 'happy anniversary' 3 times with 5 spaces in between. Now if you look to the top left corner you'll see a box that says 'Plain text', if you click on this a bunch of images will come up, click on the one that has a black circle outline. This will place your words into the circular format. Now if you click on the box with your circle of words you can stretch the circle to whatever size suits you by clicking your mouse pointer on the dots surround the design. Now you can print the design out on any colour or patterned paper, I used scallop edge scissors to cut mine out...here are some close-ups.....


And lastly, my daugther Chloe made up this card using some left-over kit goodies from my February My Creative Scrapbook kit.....she also used some pretty black crystal flourishes and stick-on pearls by Zva Creative.....

Here are some close-up pic's of her card (I thought she did a beautiful job of it!)....


I have to say I thought I'd never get into cardmaking but the girls and I really enjoyed making these! and what a great way to use up some left-over smaller scraps of papers and embellies!

Gabrielle xx

Wednesday, February 4, 2009

February's Gorgeous Kit's are here from My Creative Scrapbook!!!!

You are going to fall in love this month with the beautiful kits at My Creative Scrapbook!!! Talk about 'drool-worthy' goodies!! this kit is packed!! Gorgeous papers by MLYB called Love Letters!! with lovely flocked alpha's and chipboard pieces, sticker sets, Prima blooms and bling! and more!! Here are a couple of layouts I made using this wonderful kit (everything on these pages (except for the glitter glue is in these kits!!).....


I used the 'threading water' punch by Fiskars to create the edge that I made so I can lace up with the sheer wine colour ribbon. Here are some close ups....


This is a second layout I made using My Creative Scrapbooks main kit for February.....

This was a quick and easy page! No special handcutting, the long flowing bloom is a sticker included in the kit, I just used pop-dots to make it stand off the page and give the l/o a more 3D effect. The heart design and the flocked design are all pieces in this kit too along with a full pack of Prima blooms!.....here are some close-ups....


And if these are not enough pretties to keep you busy this month, there is also a beautiful Creative kit available.....a lovely collection of Fancy Pants papers and die cuts, chipboard, ribbons, black cut paper flourishes, rub-ons, blooms and bling (black crystals by Zva Creative!) Here is a page I made up using this pretty kit (can you tell I've had enought of winter? LOL!).....


For this one I again did a fair bit of paper tearing and used a second piece of patterned paper peeking out from underneath. The butterfly is a die-cut from the Fancy Pants die-cut sheet, I simply folded the wings up slightly and gave them a little curl between my fingers and attached by the body to the page, I lightly inked the edges of the butterfly to make it stand out better from the background paper. Here are some close-ups.....


This is a second layout I made using the same kit, .....there is such a fun variety in this kit you can put together so many different 'looks'. This page is about my sweet niece Alicja.....


I used an edging punch by Fiskars to make the scalloped edge on the light blue outside paper and used a little bit of blue chalk ink by Colorbox and some chestnut chalk ink on the edges. The top 12" black flourish is another beautiful design element included in the kit. I cut up the black Zva crystals in the kit to make the 'vine' and used a punch on some of the cream paper (the back-side of the blue flourishy paper) to make the little blooms. I made the large bloom by cutting a 6 petal bloom from left over of the black 'lace' paper (I used the empty flower spot from the die cut sheet as a template), then cutting a smaller daisy shape from the cream paper and used a punch for the small bloom. I inked the edges with brown and blue chalk ink and used some blue Stickles on the paper petals for dimension. Here are some close ups....


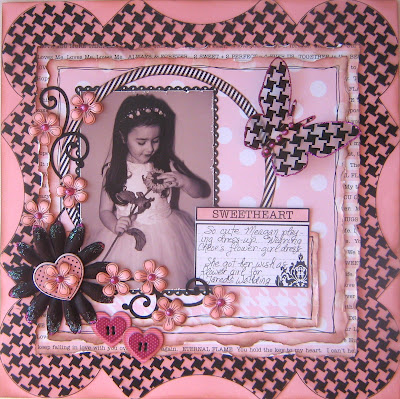
And Finally there is a wonderful Limited Edition kit this month......if you love pink and black, this one is for you!! Some really pretty Theresa Collin's papers, chipboard accents, a large sheer houndstooth design fancy edge vinyl piece that will really get your creativity going!...plus lots of fun embellies. Here is a layout I made using this kit......


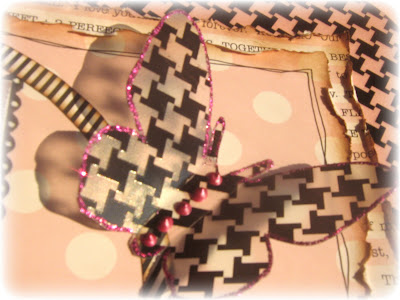
To make this page I tore the edges of a couple of pieces of the patterned paper and then layered them. I mounted them over the houndstooth vinyl piece (but I cut a section of the middle of the vinyl piece out first for other uses. From the extra piece of sheer and black vinyl I cut a butterfly shape and mounted it by the body with with wings folded up, to the page using 2 sided sticky tape.) There are plenty of fun chipboard 'button' accents and pretty journaling pieces in this kit too, so you can get creative with your embellishments!.....here are some close-ups....


This is a second page I made with this pretty Special Edition kit......


The scallop circle was part of a printed design piece in the kit that I cut out. I added some pink dots with Stickles to the scallops. I made the pink flourishes using some pink dimensional paint. (for instructions on how to make the flourish pattern see my earlier blog posting for "barefoot sandals") or you can find the instructions at My Creative Scrapbook in the tips and techniques section http://mycreativescrapbook.invisionzone.com/index.php?showtopic=500 I gave a little tutorial on this when I used this technique a few months ago. Here are some close-up pic's.....


If you want to see more, come check out the Design Team Gallery at My Creative Scrapbook and get inspired!! The Design Team Girls have done an amazing job with these 3 beautiful kits for February!! (and if you're thinking about ordering the kits ......I can tell you March is going to be another AWESOME month for kits!! So don't miss out! Pam is back from the winter CHA and has packed all the upcoming kits with loads of GORGEOUS new goodies!!) http://www.mycreativescrapbook.com/


~Gabrielle xx


LinkWithin

Related Posts with Thumbnails